I got a very good compliment tonight. Well, 3 actually. All the girls liked dinner. It was almost as good as the stuff Aunt Jenn cooks. That is a tough challenge to live up to but I am evidentally getting closer. I'll take that.
Dinner tonight was chicken and rice. (No pictures today - I forgot) It was based on a recipe that I grew up making. I think Campbell's puts this recipe on a lot of their soup cans. It is the one where you put water, rice, and soup in a dish and mix it up. Then put the chicken pieces on top and bake it. A good recipe, except for the cream soup part. Dairy products are not allowed for us. So, remake - here I come.
I used the exact same concept but I had garlic flavored chicken broth in the fridge. (Never would have bought it but it came in a meal deal during one of our shopping trips to HEB. Nice freebie!) I put the chicken broth and rice in and the chicken on top (frozen!). Bake and voila! The girls didn't stop talking about it until they were done eating it!
CHICKEN & RICE:
2 C garlic flavored chicken broth
1 1/4 C long grain/slow cook rice
4 - 6 chicken breasts (thawed or frozen, doesn't make too much difference except for cooking time)
Put the broth and rice in a 9 x 13 dish and stir it up. Place the chicken on top and cover with aluminum foil. Place in 375 degree oven for 40 - 60 minutes (40 for thawed; 60 for frozen), checking to make sure the chicken is baked thoroughly. If you want a little bit of color to your chicken, uncover and bake for another 10 minutes. You could even sprinkle a tiny bit of paprika over it. Serve. Makes 4 - 6 servings.
I served this with corn and broccoli (both frozen and cooked in the microwave). This was a good dinner with very little work involved. My kind of cooking. And it was all from the YES list!!!
Showing posts with label recipes. Show all posts
Showing posts with label recipes. Show all posts
Saturday, February 11, 2012
Friday, January 20, 2012
Monkey Face
Even though I said I was going to post weekly, I let the holiday and time with family prevail. Not a bad thing but I did not follow through with my word. For anyone out there who actually pays attention to this blog, I apologize. I intent to do better.
We are starting again. This time with Monkey Faces. Sort of. These cookies taste amazing but don't actually look anything like I was expecting from the recipe description. We'll start at the beginning.
http://community.tasteofhome.com/community_forums/f/30/t/342014.aspx
This was the link to the original recipe I used. If you look at that recipe and remember anything about our food situation, you know that I did not follow the recipe to a T. Perhaps that is why my monkey faces turned out looking like this...

 I don't know why exactly, but the ones with the raisins are slightly more chewy and soft. The others still taste wonderful but I think I will use the raisins all the time now.
We are starting again. This time with Monkey Faces. Sort of. These cookies taste amazing but don't actually look anything like I was expecting from the recipe description. We'll start at the beginning.
http://community.tasteofhome.com/community_forums/f/30/t/342014.aspx
This was the link to the original recipe I used. If you look at that recipe and remember anything about our food situation, you know that I did not follow the recipe to a T. Perhaps that is why my monkey faces turned out looking like this...

Little aliens, if you ask me. Still, they tasted good. So good that I am fending off the children as we speak.
Here's the recipe:
Mix together:
1/2 C shortening
1 C brown sugar
1/2 C molasses (I used cane syrup since that is what I had and the taste is similar. Another plus, it is cheaper than molasses.)
Add:
1/2 C almond milk (Probably any milk will do but this is what we keep for the allergenic child around here.)
1 tsp vinegar (I just used plain old white vinegar.)
Mix in:
2 1/2 C flour
1 tsp. soda
1/2 tsp. salt
1/2 tsp. ginger
1/2 tsp. cinnamon
Drop by rounded tsp. 2-12" apart on ungreased baking sheet. Place 3 raisins on each for eyes and mouth. Bake @375º 10-12 min. or until set. Remove from sheet in 1 min. Faces take on droll expressions in baking. Makes 4 doz. 2-1/2" cookies.
1/2 tsp. salt
1/2 tsp. ginger
1/2 tsp. cinnamon
Drop by rounded tsp. 2-12" apart on ungreased baking sheet. Place 3 raisins on each for eyes and mouth. Bake @375º 10-12 min. or until set. Remove from sheet in 1 min. Faces take on droll expressions in baking. Makes 4 doz. 2-1/2" cookies.
I made half of the cookies with raisins and half without. Here's the picture of the others.
 I don't know why exactly, but the ones with the raisins are slightly more chewy and soft. The others still taste wonderful but I think I will use the raisins all the time now.
Happy baking and happy blessings. May all your experiences be full of YES.
Saturday, December 17, 2011
Chicken and Noodles
So I couldn't wait to share now that I have gotten back on here. So here is the recipe that my DD5 thought was AWESOME!
Chicken and noodles is a wonderful standard meal. Why hadn't I thought of this before?
We went to my parents for Thanksgiving. My mom and I were trying to plan the meals for the time we were going to be there so we could decide if we needed to go to the store. Well, anytime I am with my mom, I think of chicken and noodles. It is one of her favorites. So, we went through the ingredients and, yep, everything is on the YES list. Now why did this take so long to register? Well, my daughter loved it.
It is now about 3 weeks later and I was thinking about dinner while doing some Christmas shopping. I am normally better about my dinner planning but I had been lazy lately. I was thinking of my mom and chicken and noodles popped to mind. So, when I got home I got the chicken out of the freezer and got dinner started. It was a HUGE hit. The words awesome, yummy, good, love, and more were said over and over. Why didn't I think of this one before? She even asked if I had made enough for leftovers for tomorrow. (I had. She was happy.)
So, on to the recipe. (Don't forget that I do a lot of "whatever I have on hand"! Substitute where needed.)
 2 large chicken breasts (provided about 3 cups of meat after it was cooked)
6 C water
Spices & seasonings: salt, thyme, parsley, basil
4 large carrots
1 C frozen peas (or whatever amount you have of whatever veggie you have leftover)
8 oz mini shell noodles, uncooked (or whatever shape and size you want; the ones I used were egg free)
3 T flour
water to make a paste with flour (you want it kind of liquidy but I forgot to measure this; I always just eyeball it)
Put the frozen or thawed chicken into a stockpot with the water. Add your spices and seasonings, about a palm full of each. Bring the water to a boil and then turn down the heat to a slow boil. Let it cook until the chicken is done (about 40 minutes for frozen; about 20 minutes for thawed). Add the carrots and let cook for another 10 minutes. Remove the chicken and shred. While you are shredding the chicken, add the noodles. Let cook until the noodles are done, adding your veggies about 5 minutes before your noodles are done and the chicken whenever you get it shredded. Make a paste from the flour and water. Add it to the pot, stirring to help prevent lumps. This will thicken it up just a bit and make it yummier!
All done. Spoon it up and serve with bread, rolls, crackers, or nothing at all. And, enjoy more Food In The World of YES!
Chicken and noodles is a wonderful standard meal. Why hadn't I thought of this before?
We went to my parents for Thanksgiving. My mom and I were trying to plan the meals for the time we were going to be there so we could decide if we needed to go to the store. Well, anytime I am with my mom, I think of chicken and noodles. It is one of her favorites. So, we went through the ingredients and, yep, everything is on the YES list. Now why did this take so long to register? Well, my daughter loved it.
It is now about 3 weeks later and I was thinking about dinner while doing some Christmas shopping. I am normally better about my dinner planning but I had been lazy lately. I was thinking of my mom and chicken and noodles popped to mind. So, when I got home I got the chicken out of the freezer and got dinner started. It was a HUGE hit. The words awesome, yummy, good, love, and more were said over and over. Why didn't I think of this one before? She even asked if I had made enough for leftovers for tomorrow. (I had. She was happy.)
So, on to the recipe. (Don't forget that I do a lot of "whatever I have on hand"! Substitute where needed.)

6 C water
Spices & seasonings: salt, thyme, parsley, basil
4 large carrots
1 C frozen peas (or whatever amount you have of whatever veggie you have leftover)
8 oz mini shell noodles, uncooked (or whatever shape and size you want; the ones I used were egg free)
3 T flour
water to make a paste with flour (you want it kind of liquidy but I forgot to measure this; I always just eyeball it)
Put the frozen or thawed chicken into a stockpot with the water. Add your spices and seasonings, about a palm full of each. Bring the water to a boil and then turn down the heat to a slow boil. Let it cook until the chicken is done (about 40 minutes for frozen; about 20 minutes for thawed). Add the carrots and let cook for another 10 minutes. Remove the chicken and shred. While you are shredding the chicken, add the noodles. Let cook until the noodles are done, adding your veggies about 5 minutes before your noodles are done and the chicken whenever you get it shredded. Make a paste from the flour and water. Add it to the pot, stirring to help prevent lumps. This will thicken it up just a bit and make it yummier!
All done. Spoon it up and serve with bread, rolls, crackers, or nothing at all. And, enjoy more Food In The World of YES!
Friday, August 26, 2011
Crock Pot again!
So, there are no pictures to go with this one but it was success!!!
I love my crock pot/slow cooker and with the temps at 105 and higher still, it is getting a work out. Last night, it was chicken. I am not putting this one in recipe format because it is so simple!
I got out the slow cooker about 3 PM. I poured a couple of tablespoons of canola oil in and them poured in about 1/4 - 1/2 C of red wine vinegar. I put in about 3 pounds of chicken breasts (bone-in) and sprinkled it over the top with creole seasoning (Tony Chachere's). That was it. Put it on 3 (medium) until 6 PM and it was done and yummy. The girls like it a lot and even asked if I would send it for their lunch today. I was more than happy to! Oh, and there was plenty of leftovers!
Hope you enjoy this sweet, flavorful, juicy chicken.
Sunday, August 21, 2011
Grits
 |
| The grits were good served with a vegetable medley. |
However, not long ago, my wonderful mother-in-law brought me a whole bunch of different grains from a gristmill they had visited. One of the things she brought was grits. I had no idea how to make grits so I just followed the directions on the bag.
It took 10 minutes in the microwave. The measurements were 1 C grits to 2 1/2 C water. I also added salt to taste and a couple of tablespoons of margarine when they came out of the microwave. I really like them. They can be cooked on the stove top or in the microwave. I served them with some veggies that I cooked on the stove top. I will give you that concoction in another post.
All in all, I would certainly recommend trying these. You should know that there are some rather large pieces of corn hull or husk or something in the grits that I had. Just be aware of how coarsely ground your grits are if you are serving them to small children. Also, if you have a corn allergy, these are not for you since most grits are ground up corn. But, this is allergy free otherwise.
At any rate, something new that the girls ate - a positive dinner.
Saturday, August 13, 2011
Not Your Normal Bean Dip
For dinner the other evening, I cut up some fresh veggies. The girls normally balk at just plain old veggies so I thought I would whip out some kind of a dip. What came to mind is hummus. Now, I don't know if I can technically call this hummus or not since it is not made of chickpeas so bean dip it is.
 I just mentally ran through what I had around, including the freezer, and in the freezer I had great northern beans. When I cook beans, I take the whole bag of dried beans and cook them all at once. Then I freeze whatever I didn't use in 2 cup portions, which is about the same amount as 1 can of beans from the store. So, white beans it was.
I pulled them out and threw them in the microwave to thaw, along with a bunch of red bell peppers that I had already cut up. After they were thawed, I dumped them in the blender with some sunflower butter (again, what I had), lemon juice, cumin, paprika, salt, and pepper. I pureed it all up and served it.
Once again, the girls wouldn't eat it even though 2 of them said it was good. I don't know. I will just keep trying, I guess. The next "try" will be to see if hummus freezes and thaws since I can't eat all of this by myself and I don't think my husband will help.
Oh, here's the actual recipe!
Not Your Normal Bean Dip -
Blend it all up and use as a dip or spread. Eat up!

I pulled them out and threw them in the microwave to thaw, along with a bunch of red bell peppers that I had already cut up. After they were thawed, I dumped them in the blender with some sunflower butter (again, what I had), lemon juice, cumin, paprika, salt, and pepper. I pureed it all up and served it.
Once again, the girls wouldn't eat it even though 2 of them said it was good. I don't know. I will just keep trying, I guess. The next "try" will be to see if hummus freezes and thaws since I can't eat all of this by myself and I don't think my husband will help.
Oh, here's the actual recipe!
Not Your Normal Bean Dip -
- 2 cups OR 1 15oz can any kind of white bean
- 1/2 sliced red bell pepper
- 1/2 lemon, juice only OR about 2 T lemon juice
- 2 T sunflower butter (you could probably do peanut butter or tahini instead, but have not tried that)
- 1 - 2 tsp cumin, to taste
- 1 - 2 tsp paprika, to taste
- 1 tsp salt
- 1/2 tsp ground black pepper
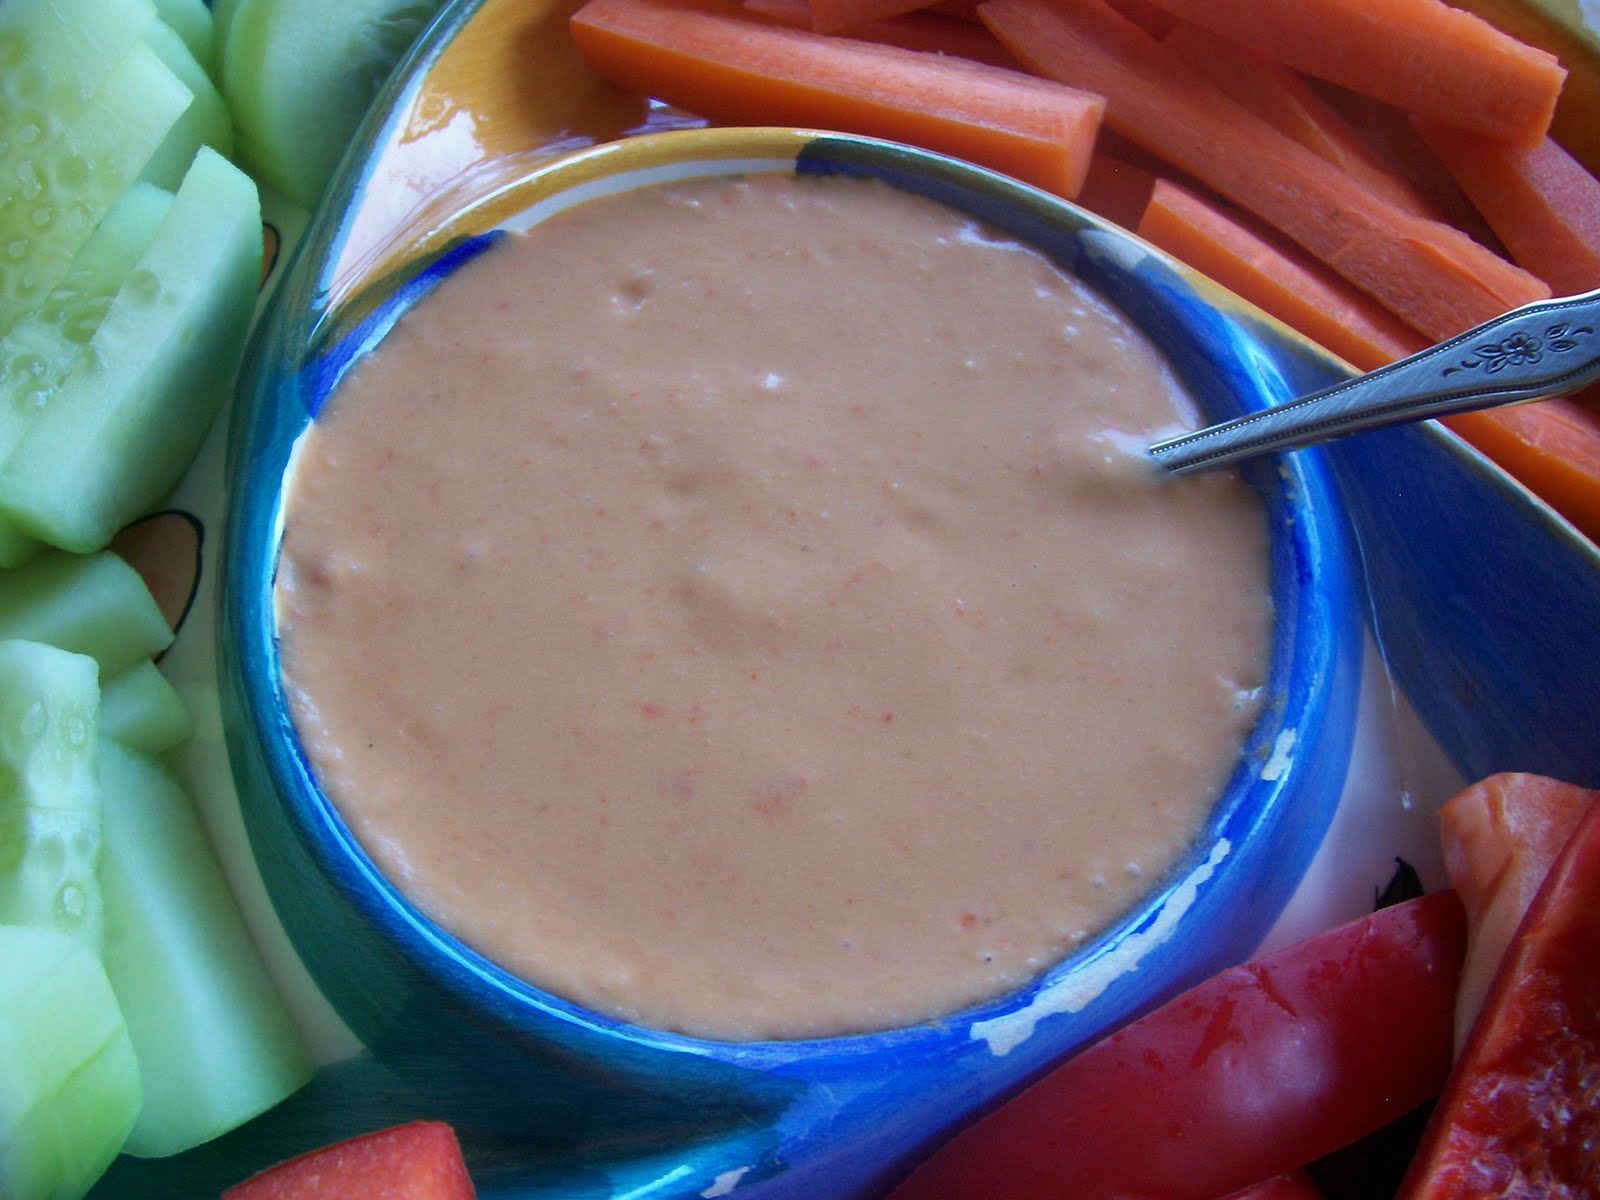
Blend it all up and use as a dip or spread. Eat up!
Tuesday, August 9, 2011
Dinner Menu
Dinner the other evening was a success. Of course, when I choose sausage, it is seldom anything else. The girls all love sausage. Usually, I just cut up the smoked sausage links and brown the pieces in a skillet. I needed something different though.
 I took the turkey sausage, about 14 ounces, and boiled it with the juice from a large can of pineapple chunks. It turned out sweet, with a nice citrus flavor, without being overwhelmingly pineapple-y. I just simmered it until the rest of the dinner was ready and the sausage was heated through.
So our menu was this:

So our menu was this:
- turkey smoked sausage boiled in pineapple juice
- canned pineapple
- sliced red bell peppers and cucumbers
- black beans (prepared ahead and frozen, then thawed for this dinner)
- carrots and broccoli (from a bag of frozen veggies)
Thursday, August 4, 2011
Snickerdoodles
Cookies are always a hit. One of my favorite things to make in the kitchen has always been cookies. I love cookies.
 However, if you have food allergies in your family, you know just how few recipes are out there without something that your child is allergic to. Well, here is a good one that does not have milk or eggs. It comes from my childhood and my mother, who taught me so much. Actually, I modified the one from my mom so that it does not include eggs but she won't mind. So here we go.
SNICKERDOODLE COOKIES

Mix 3 T sugar and 3 T ground cinnamon. Roll balls in mixture. Place on ungreased cookie sheet. Bake 8 - 10 minutes. Cook on rack. Makes about 6 dozen cookies.
Enjoy this treat.

SNICKERDOODLE COOKIES

- 1 1/2 C sugar
- 1/2 C margarine, softened
- 1/2 C vegetable shortening
- 4 T arrowroot flour
- 4 T water
- 2 3/4 C flour
- 2 t cream of tartar
- 1 t baking soda
- 1/4 t salt
- 3 T sugar
- 3 T ground cinnamon
Mix 3 T sugar and 3 T ground cinnamon. Roll balls in mixture. Place on ungreased cookie sheet. Bake 8 - 10 minutes. Cook on rack. Makes about 6 dozen cookies.
Enjoy this treat.
Monday, August 1, 2011
Egg Substitutes
Did you ever get up and decide to work on a recipe only to read eggs in the list and know you didn't have any? Used to be that I would put that recipe aside. Now, I know better. Since DD number 2 has been diagnosed with an egg allergy, I have found out that there are actually a huge number of possible substitutes.
I have used several of them. In fact, the cookies in the oven right now used the arrowroot flour substitute. You will do better if you have an idea of the taste of what you are making is like - mainly sweet or savory. I am going to be making cupcakes tomorrow using an egg substitute. I will let you know how that turns out.
For now, here is the list that I have compiled of possible substitutes for eggs.
 | |
| These Snickerdoodles were made with arrowroot flour. |
For now, here is the list that I have compiled of possible substitutes for eggs.
Use one of the following bullets for each egg, up to 3 eggs, paying attention to the type of dish you are making and the flavors that will compliment it.
- 1 tsp baking powder + 1 T liquid + 1 T vinegar
- 1 tsp yeast dissolved in ¼ C warm water
- 1 ½ T water + 1 ½ T oil + 1 tsp baking powder
- 1 pkg gelatin + 2 T warm water; mix just prior to use
- 2 T arrowroot flour
- 2 T applesauce + ¼ tsp baking powder
- ½ banana (medium, mashed) + ¼ tsp baking powder
- 1 T vinegar + 1 tsp baking soda
- 2 T lemon juice + 1 tsp baking soda
- 1 T cornstarch + 3 T water
Wednesday, July 27, 2011
Yummy but no takers...plus a recipe
A week or so ago, I bought two large fresh beets at the store intending to roast them for dinner one night. I didn't get around to it until I saw this recipe from the Weelicious site for a hummus dip. I thought it would be perfect. Bright pink!! What more could these 3 girls want? Pink food would fit right in. Boy, was I wrong about the girls.
But let me put this all in order. I made the beets Monday night for dinner. If you are going to make this, let me give you a tip...beets do not microwave cleanly! I thought that since it was 105 yesterday evening, I would do them in the microwave instead of roasting the beets in the oven. Big mistake, kind of.
Here's the recipe and what I did: I cut each one (I did two so we could eat one for dinner) into about 8 pieces and put them in a microwave safe dish. I added a couple of tablespoons of water, some diced garlic, and a few dashes of dried rosemary. I popped that into the microwave for 10 minutes, planning to check it but expecting it to need about 10 more minutes (for a total of about 20). Well, when I checked it, the water was a beautiful pink and boiling out all over the microwave. I decided that since it was already messy, I might was well finish. So I did. When I took them out, the pink water was everywhere but wiped up nicely and I now have a very clean microwave.
Anyway, at that point, I let the beets cool a bit and then peeled them with a knife and fork. I cut them into bite-sized pieces and reserved half for the hummus recipe (it ended up being right at a cup). I thought these were super yummy but the girls would not eat them.

Tueday for lunch I figured we would have a Pinkalicious lunch, since they love those books, the beet hummus being the pink part. I followed the recipe from Weelicious, except that I had done the beets the night before. The food was a beautiful dark pink.
And it was so yummy! But, alas, they would not like it.
You know what that means... I had to eat it. I did not eat it all in one sitting, though that was VERY tempting. I will probably finish it up in two, though. I had bite-sized wheat crackers and bell pepper strips to dip with. So good!
I think this one will have to come back a few times and if they don't ever like it, more for me!!
Oh well... on to the next attempt.
Enjoy!
Monday, July 25, 2011
Homemade Pop Tarts
Who doesn't love a pop tart? But have you looked at that label!? Name an allergen and it is probably in there, not to mention all those non-healthy things.
My kids love pop tarts but we have hardly ever bought them. Add that to the food allergy diagnosis. Result: all of us cannot eat them so we will not buy them. Somewhere along the line, a friend had shared this recipe with me for making our own pop tarts. (If I knew where it came from, I would link to it. That cook deserves credit! I did have to change it for allergy purposes, though.) It is so good! It ranks right up there with homemade donuts. Make these ahead of time and they are better, though right out of the oven is good, too.
 HOMEMADE POP TARTS:
2 C flour
1 tsp salt
1/2 C shortening
5-7 T ice cold water
jams or jellies of your choice
1 C powdered sugar
1 tsp vanilla flavoring
1-2 T water
food coloring of your choice
sprinkles of your choice
Mix the flour, salt, and shortening in a bowl. Add the water and mix until well blended but don't over mix. This will make the dough tough. (Up to this point, this is just your standard pie crust recipe for a double crust pie. So, it is conceivable that you could just buy frozen or refrigerated pie crusts to use. I have not tried this.)
Roll the dough out thin and cut into rectangles that are about 3" x 5". Place about 1 tsp of jam or jelly on one end of each rectangle. Fold it over and seal the edges. (You can either wet the edge with water and press closed or use a fork to crimp the edges closed.) The directions said to place on a cookie sheet covered in foil and sprayed with non-stick spray; I put them on a baking stone. Whatever you have... Bake at 425 for about 10 minutes or until browned. If the edges aren't sealed well, the jelly will drip out so be prepared.
After they are cooled, mix up the powdered sugar, vanilla, food coloring, and water until you have a slightly liquid icing. Lay the pop tarts on a cooling rack and drizzle the icing over them. Add the sprinkles and you are ready to eat.
My only other bit of advice: be prepared to either make them again for the next day or be prepared to say no. These are yummy and addictive. Everyone will love them and want more.
Have a great breakfast, treat, or dessert!
Wednesday, July 20, 2011
Brownies...not!
"I like brownies." That is what I heard all through dinner tonight. The problem? It was most definitely not brownies. DD3, age 2, was referring to the turkey sausage crumbles in the spaghetti we had. I have no idea where brownies came from but she was not giving up that name.
Normally, when 2 out of 3 kids like what is for dinner, I am thrilled. Now, however, when the one who doesn't like it is DD2 with all the food allergies, it is not something I am happy with. I loved the dinner, though. And the other two girls ate like crazy! I guess we will just have to give this one another try because it was a hit with everyone else. So, here's the recipe that I used for spaghetti.
Spaghetti (for those with food allergies):
In a separate skillet, heat the oil and margarine. I like the flavor you get when combining the two. Put in the veggies that take the longest to cook and saute for a couple of minutes. Add in the rest of the veggies, depending on how long they take, and the sausage crumbles. My order was onions, saute for a few minutes; carrots, saute for a minute or two; squash, saute for a couple of minutes; mushrooms, only leaving in for a minute or two so they don't get mushy.
After getting all the veggies in, add the cooking water from the pasta and let it simmer for a couple of minutes. Sprinkle the cornstarch over the top of all this and then stir it in good to let it thicken a bit. Salt and pepper to taste.
Place a serving of noodles on a plate and top with the veggie and sausage mixture. If you want you can sprinkle a tad of parmesan cheese over the top.
I really enjoyed this. I felt like the flavor ended up very rich and full without too much stuff in it. My 2 year old couldn't get enough of this. She ate until she found the bottom of her plate and I gave her too much. She was cleaning up everything around her to get more of this dish. I hope your family likes it just as much.
Normally, when 2 out of 3 kids like what is for dinner, I am thrilled. Now, however, when the one who doesn't like it is DD2 with all the food allergies, it is not something I am happy with. I loved the dinner, though. And the other two girls ate like crazy! I guess we will just have to give this one another try because it was a hit with everyone else. So, here's the recipe that I used for spaghetti.
Spaghetti (for those with food allergies):
- 1 box spaghetti noodles (I used whole-wheat and it was a 13.5 ounce box)
- lots of veggies: use whatever you have; I had 1 yellow summer squash, 2 carrots, 1/2 onion, and 5 decent sized mushrooms
- 6 - 8 ounces precooked turkey sausage crumbles (you can use whatever you prefer but we have a pork allergy in our house and so we use turkey)
- 1-2 T oil (I used canola)
- 1-2 T margarine
- 2 large ladles of the cooking water from the pasta
- 2 T cornstarch
- salt and pepper to taste
- parmesan cheese, optional

In a separate skillet, heat the oil and margarine. I like the flavor you get when combining the two. Put in the veggies that take the longest to cook and saute for a couple of minutes. Add in the rest of the veggies, depending on how long they take, and the sausage crumbles. My order was onions, saute for a few minutes; carrots, saute for a minute or two; squash, saute for a couple of minutes; mushrooms, only leaving in for a minute or two so they don't get mushy.
After getting all the veggies in, add the cooking water from the pasta and let it simmer for a couple of minutes. Sprinkle the cornstarch over the top of all this and then stir it in good to let it thicken a bit. Salt and pepper to taste.
Place a serving of noodles on a plate and top with the veggie and sausage mixture. If you want you can sprinkle a tad of parmesan cheese over the top.
I really enjoyed this. I felt like the flavor ended up very rich and full without too much stuff in it. My 2 year old couldn't get enough of this. She ate until she found the bottom of her plate and I gave her too much. She was cleaning up everything around her to get more of this dish. I hope your family likes it just as much.
Monday, July 18, 2011
Yummy and Cool: Jello Blocks
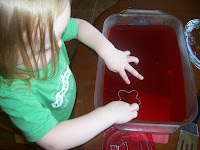
With the heat like it is, we have to do something cool. Water play in the backyard only goes so far. To help cool us off, I went for something from my childhood. Jello blocks. Only now, they are officially called jello jigglers or some other name like that. I will call them jello blocks since that is what they have always been to me.
In my memory, my mom made these a lot. Whether that is true or not, I don't know. But I remember them often being in the fridge and they were always yummy. And even better, they are allergen free as far as I can tell. So, here we go...
 JELLO BLOCKS:
 Lightly grease a 9x13 pan. In a large heat-proof bowl, mix the jello and the boiling water. Whisk until the jello is dissolved. Add the cold water or juice. Pour into the pan. Refrigerate over night or until well set. Using your choice of cookie cutters, cut shapes out of the jello. I always put the in-between parts in a bowl and serve like regular jello. If you don't want to do cookie cutters, you could always just use a knife and cut them into, get this, blocks!
FYI - Don't leave these out in the heat; they will melt.
I hope you enjoy this cool treat for this ridiculously hot summer!
In my memory, my mom made these a lot. Whether that is true or not, I don't know. But I remember them often being in the fridge and they were always yummy. And even better, they are allergen free as far as I can tell. So, here we go...
 JELLO BLOCKS:
- 2 small packages or 1 large package any flavor jello (I used sugar-free for this but any would work.)
- 2 C boiling water
- 1 1/2 C cold water or fruit juice (I like the fruit juice. It really adds flavor and makes use of the leftovers from canned fruit.)
 Lightly grease a 9x13 pan. In a large heat-proof bowl, mix the jello and the boiling water. Whisk until the jello is dissolved. Add the cold water or juice. Pour into the pan. Refrigerate over night or until well set. Using your choice of cookie cutters, cut shapes out of the jello. I always put the in-between parts in a bowl and serve like regular jello. If you don't want to do cookie cutters, you could always just use a knife and cut them into, get this, blocks!
FYI - Don't leave these out in the heat; they will melt.
I hope you enjoy this cool treat for this ridiculously hot summer!
Thursday, July 14, 2011
It's hot! No baking!
I don't know about you all but we are baking. In the heat outside! With our high temps over 100 every day, I just cannot stand to think about turning on the oven. So, out comes the slow cooker.
Now, whatever you want to call it, a slow cooker or a crockpot, they work the same. I have a slow cooker. One benefit of that is it can be used on the burner to jump start the cooking or to thicken juices at the end or any number of other things.
I like to make Sunday lunch in the slow cooker since it will be mostly finished when we get home from church. I made a yummy chicken this time. Super easy!! And, with no allergy foods involved.
 Slow Cooker Chicken:
Cook at high for about 2 hours, medium for 3-4 hours, or slow for 6-8 hours, depending on your day and when you can turn it on. Enjoy!
We have always loved a good roast at our house. That was one of DD2's favorite meals and one of the things she will list when talking about what she misses now that she has identified allergies. Being allergic to beef and pork took both of the roasts we like off of the table. DD2 mentioned that it was like having a roast.
All in all, a great replacement. Happy slow cooking!
Now, whatever you want to call it, a slow cooker or a crockpot, they work the same. I have a slow cooker. One benefit of that is it can be used on the burner to jump start the cooking or to thicken juices at the end or any number of other things.
I like to make Sunday lunch in the slow cooker since it will be mostly finished when we get home from church. I made a yummy chicken this time. Super easy!! And, with no allergy foods involved.

- chicken - I used 8 pieces of chicken tenders but you can use however much of whatever kind you want for your family
- 1 large onion - peeled and sliced into rings
- 6-8 large carrots - washed and scrubbed and cut into pieces about 4 inches long (if you use small carrots or cut them small, they will fall apart while cooking)
- 1/2 cup of water
Cook at high for about 2 hours, medium for 3-4 hours, or slow for 6-8 hours, depending on your day and when you can turn it on. Enjoy!
We have always loved a good roast at our house. That was one of DD2's favorite meals and one of the things she will list when talking about what she misses now that she has identified allergies. Being allergic to beef and pork took both of the roasts we like off of the table. DD2 mentioned that it was like having a roast.
All in all, a great replacement. Happy slow cooking!
Monday, July 11, 2011
Sometimes things just don't work...
but sometimes they do.
Now that regular ice cream, frozen yogurt, sherbert, and most frozen treats are not in our diet, we are needing to come up with ideas and recipes for something sweet at the end of dinner.
We tried to make apple pie "ice cream" for dessert the other night. While the taste was really good, the texture just didn't cut it. All of the girls liked it and we even had a guest that night who said she liked it. The texture was not up to par and the next evening, it was just not edible because it had become so icy.
Since this didn't work well, we have researched options and will be trying it again. When it works, I will definitely share apple pie "ice cream" with you all.
We have had something good work and it was super easy! Watermelon. It works so many different ways. We have cut it up and just served it like that. The kids like it but popsicles or snow cones are just so much more fun when it is 105 degrees outside. So, we have done two different things with it that worked well.
First, when I was cutting up the watermelon, I saved the juice and froze it. I used the cute little containers that go with the ice shaver from Pampered Chef. Then after the juice is frozen, we shaved it into snow cones/cups using the Pampered Chef ice shaver. A hit!


Second, we took some of the watermelon and its juice and blended it all up really well. Then we just poured it into popsicle molds and froze it. All done!

Now these won't take the place of ice cream so we'll continue working on that but all in all, success!! I hope you are able to find you own ways to stay cool.
Sunday, July 10, 2011
Baked Beans Recipe
I learned to cook from my mother. She was, and is, a wonderful teacher. She taught me well. By the time I was a teenager, I could cook (and clean up) an entire meal. When I was able to drive, I could go do the shopping by myself, too. So, why in the world am I finding it so difficult to cook for my family now? One word: staples.
No, not the metal kind. The keep-the-pantry-full, go-to-meal kind of staples. Hamburger meat, potatoes, tomatoes, rice, tomato sauce, pasta, frozen veggies, etc. I have always stocked my pantry with those things and many more and relied on them for cooking. Due to the food allergy diagnosis, much of that has flown out the window so I have to reconfigure this. One day at a time.
Today, that looks like baked beans. We need a good source of protein. Our go-tos were milk, cheese or peanut butter. Now, I don't know what it will be but beans are pretty good. Baked beans, though, was a new one for me. It was a hit. Most recipes call for canned pork and beans as the basis of the recipe or included bacon. Due to a pork allergy, those were not great for us. So I created my own. Here is what I did instead.
BAKED BEANS:
1 lb bag of dry pinto beans
2 T mustard*
3-5 T Worchestershire sauce*
1/2 - 3/4 C brown sugar*
Prepare your beans according to the package directions, omitting any salt. (I did the quick soak method - boil for 5 minutes, turn off heat and soak for 2 hours, simmer until tender.)
Place your beans in a large pot and add the mustard, W sauce, and brown sugar. Start with just a little of the brown sugar, mix it up really good, and taste. You may want more, you may not. I was probably a bit shy of the 1/2 C mark but I know some folks like their baked beans nice and sweet. Bake them next. Put them in the oven at 375 for about 25 or 30 minutes, just to let the flavors blend. I skipped baking them because I didn't want to heat up the house and wasn't going to use them for almost another 24 hours. I decided the flavors would blend well enough and they did. Serve these hot or cold. This makes a ton! We have a couple of containers in the freezer but all 3 of my children loved these beans.
*I just guessed at these amounts but like the results that I came up with. Feel free to adjust them to whatever suits your tastes.
If you try this, please let me know how it turns out. I welcome feedback. Things that I put down are trials that worked out (or maybe not) for me. Every recipe is open to interpretation and substitution. That is how something good becomes better. Enjoy!
Saturday, July 9, 2011
YES from no
Ever been on a roller coaster ride? Well, that is why I am here. No, I haven't ridden a roller coaster recently but we are on a daily roller coaster with food allergies.
My DD #2 was recently diagnosed with a ton of food allergies. We are very blessed - none of them are considered life threatening. (Just so you know, the food allergies are milk, soy, beef, pork, potato, tomato, egg, and peanut.) She also has lots of allergies to grasses and trees, things we can't control. In response, we are going to work on controlling food as best we can.
In my search for information, I have come across many, many things that I am unable to use. "No, can't do this" or "Nope, that has _____ (fill in the allergenic food)." I was quickly becoming someone who was saying "No" way too often.
The title of this blog came from my overwhelming desire to become one who can answer "YES" when it comes to food. I want to focus on the positive aspects of this for my daughter so she won't feel deprived or left out and so that the whole family is excited about the new items being offered.
So, Food In The World of YES is born.
What I am going to attempt to do is to post often. There are no promises about how often. I am in the middle of summer with 3 little girls, after all. But I will do my best to not leave you hanging. I am going to attempt to share with you all the wonderful foods we can eat and how I have figured out to prepare them so that our whole family enjoys them.
Thank you for visiting me at Food In The World of YES and I hope you visit again soon.
Tomorrow: my first recipe!!
Subscribe to:
Posts (Atom)